
From Wildflower to Pattern: A Process Rooted in Observation & Practice
Most of my hero or main patterns I create, begin long before I create the final pattern. It begins with photographs, sketches, and walks through Australian landscapes over time - and in the steady practice of translating what I notice into line, layers, colour and form.
Coastal Banksia blossoms and wildflower horizon during golden hour, Brooms Head NSW © 2026 Kerry Warnholtz
“Simplicity is about subtracting the obvious and adding the meaningful.”
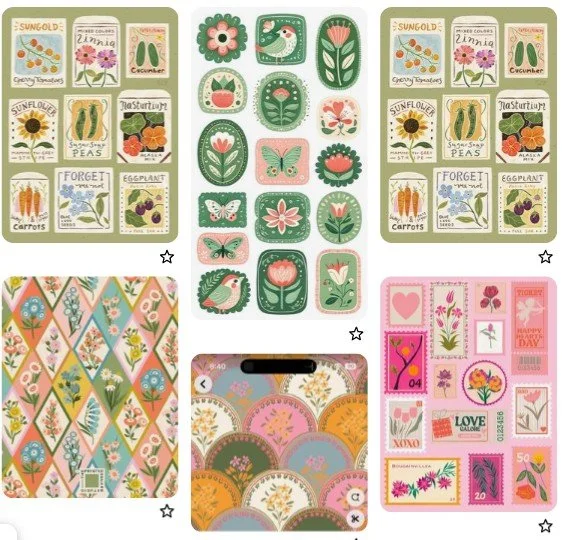
Recently, I found myself drawn to a Spoonflower challenge called 'Wildflower Collage’. It was the first seamless pattern design challenge I had entered in 12 months. I didn’t enter it to compete or even try to win. I approached it as a prompt…a structured invitation to explore how Australian flora might sit together in a structured, cohesive composition. It was also an exercise to refresh my habit of creating pattern designs.
When I read the brief, the words vintage and wildflower, together with seeing the warm, earthy colours and textures appealed to me. I also knew that the concept of frames and collages was currently popular. And even though I’m not one for chasing trends, the reality is, if I want my patterns to be appealing, I have to create something that people want to buy. And of course, for me wildflowers meant Australian wildflowers. What more could I want?
Establishing Direction
Before even starting a pattern, I created a Pinterest board, where I gathered inspirational images of collage patterns that I was drawn to, in order to get ideas. The colours which emerged from these images were not surprisingly, made up of (mostly) muted greens, warm neutrals, as well as layered botanicals. I also gathered reference images for the wildflowers, made up of both my own photographs (refer Banksia and Christmas Bush images below) and others’ photographs to help me decide which wildflowers I would choose to sketch. It would be somewhere to begin.

The Botanical Foundations
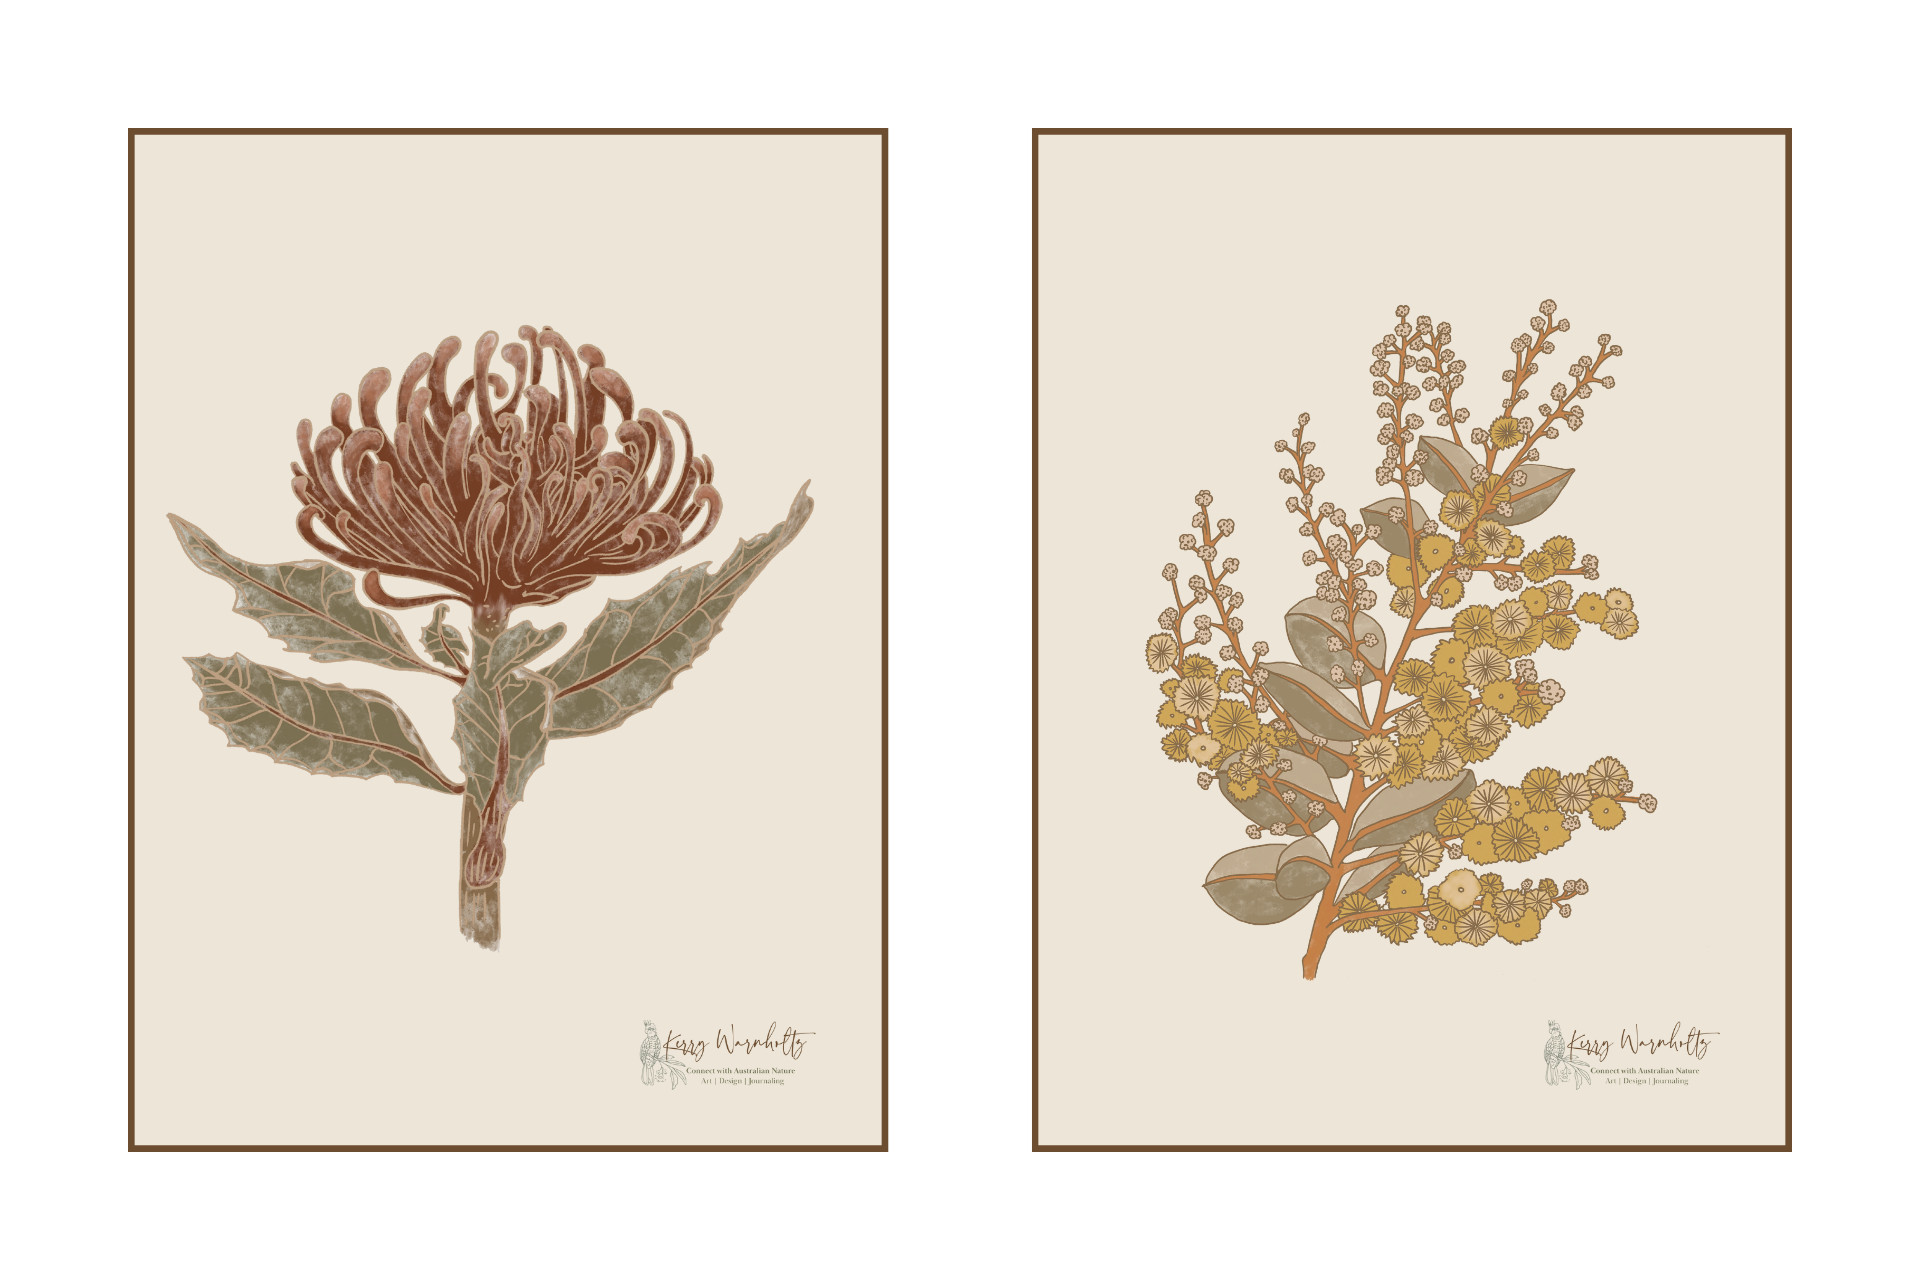
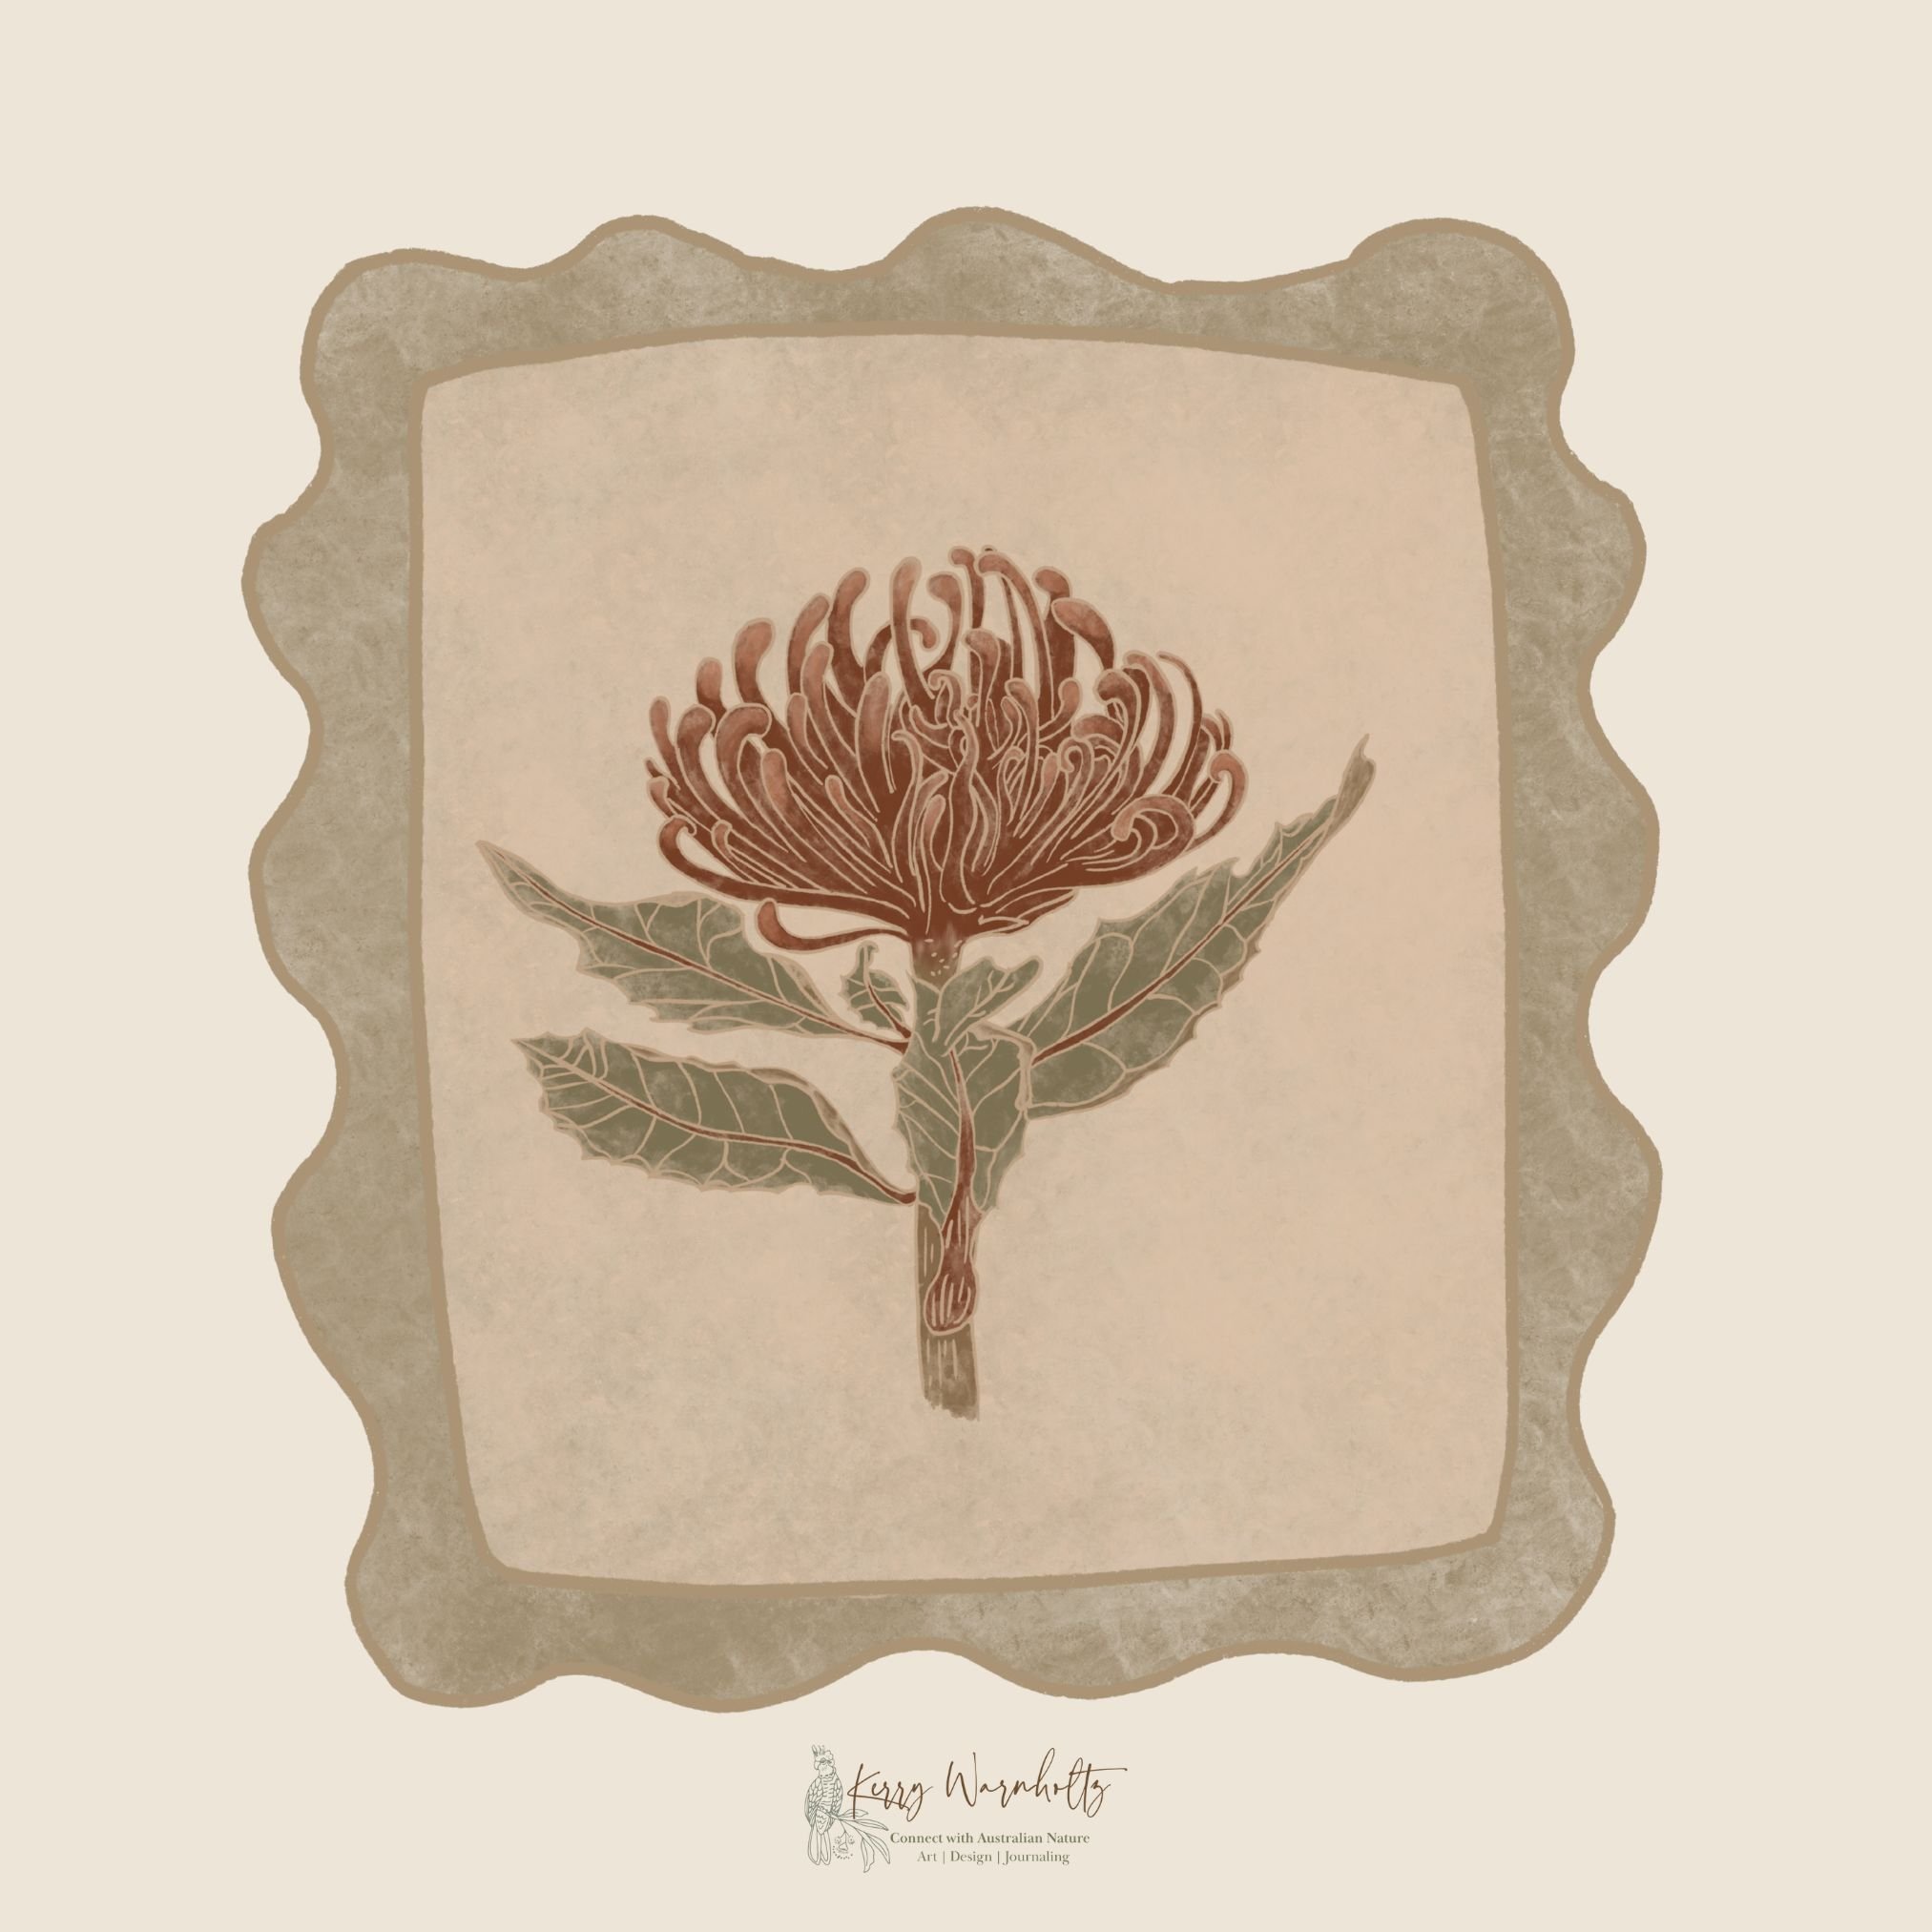
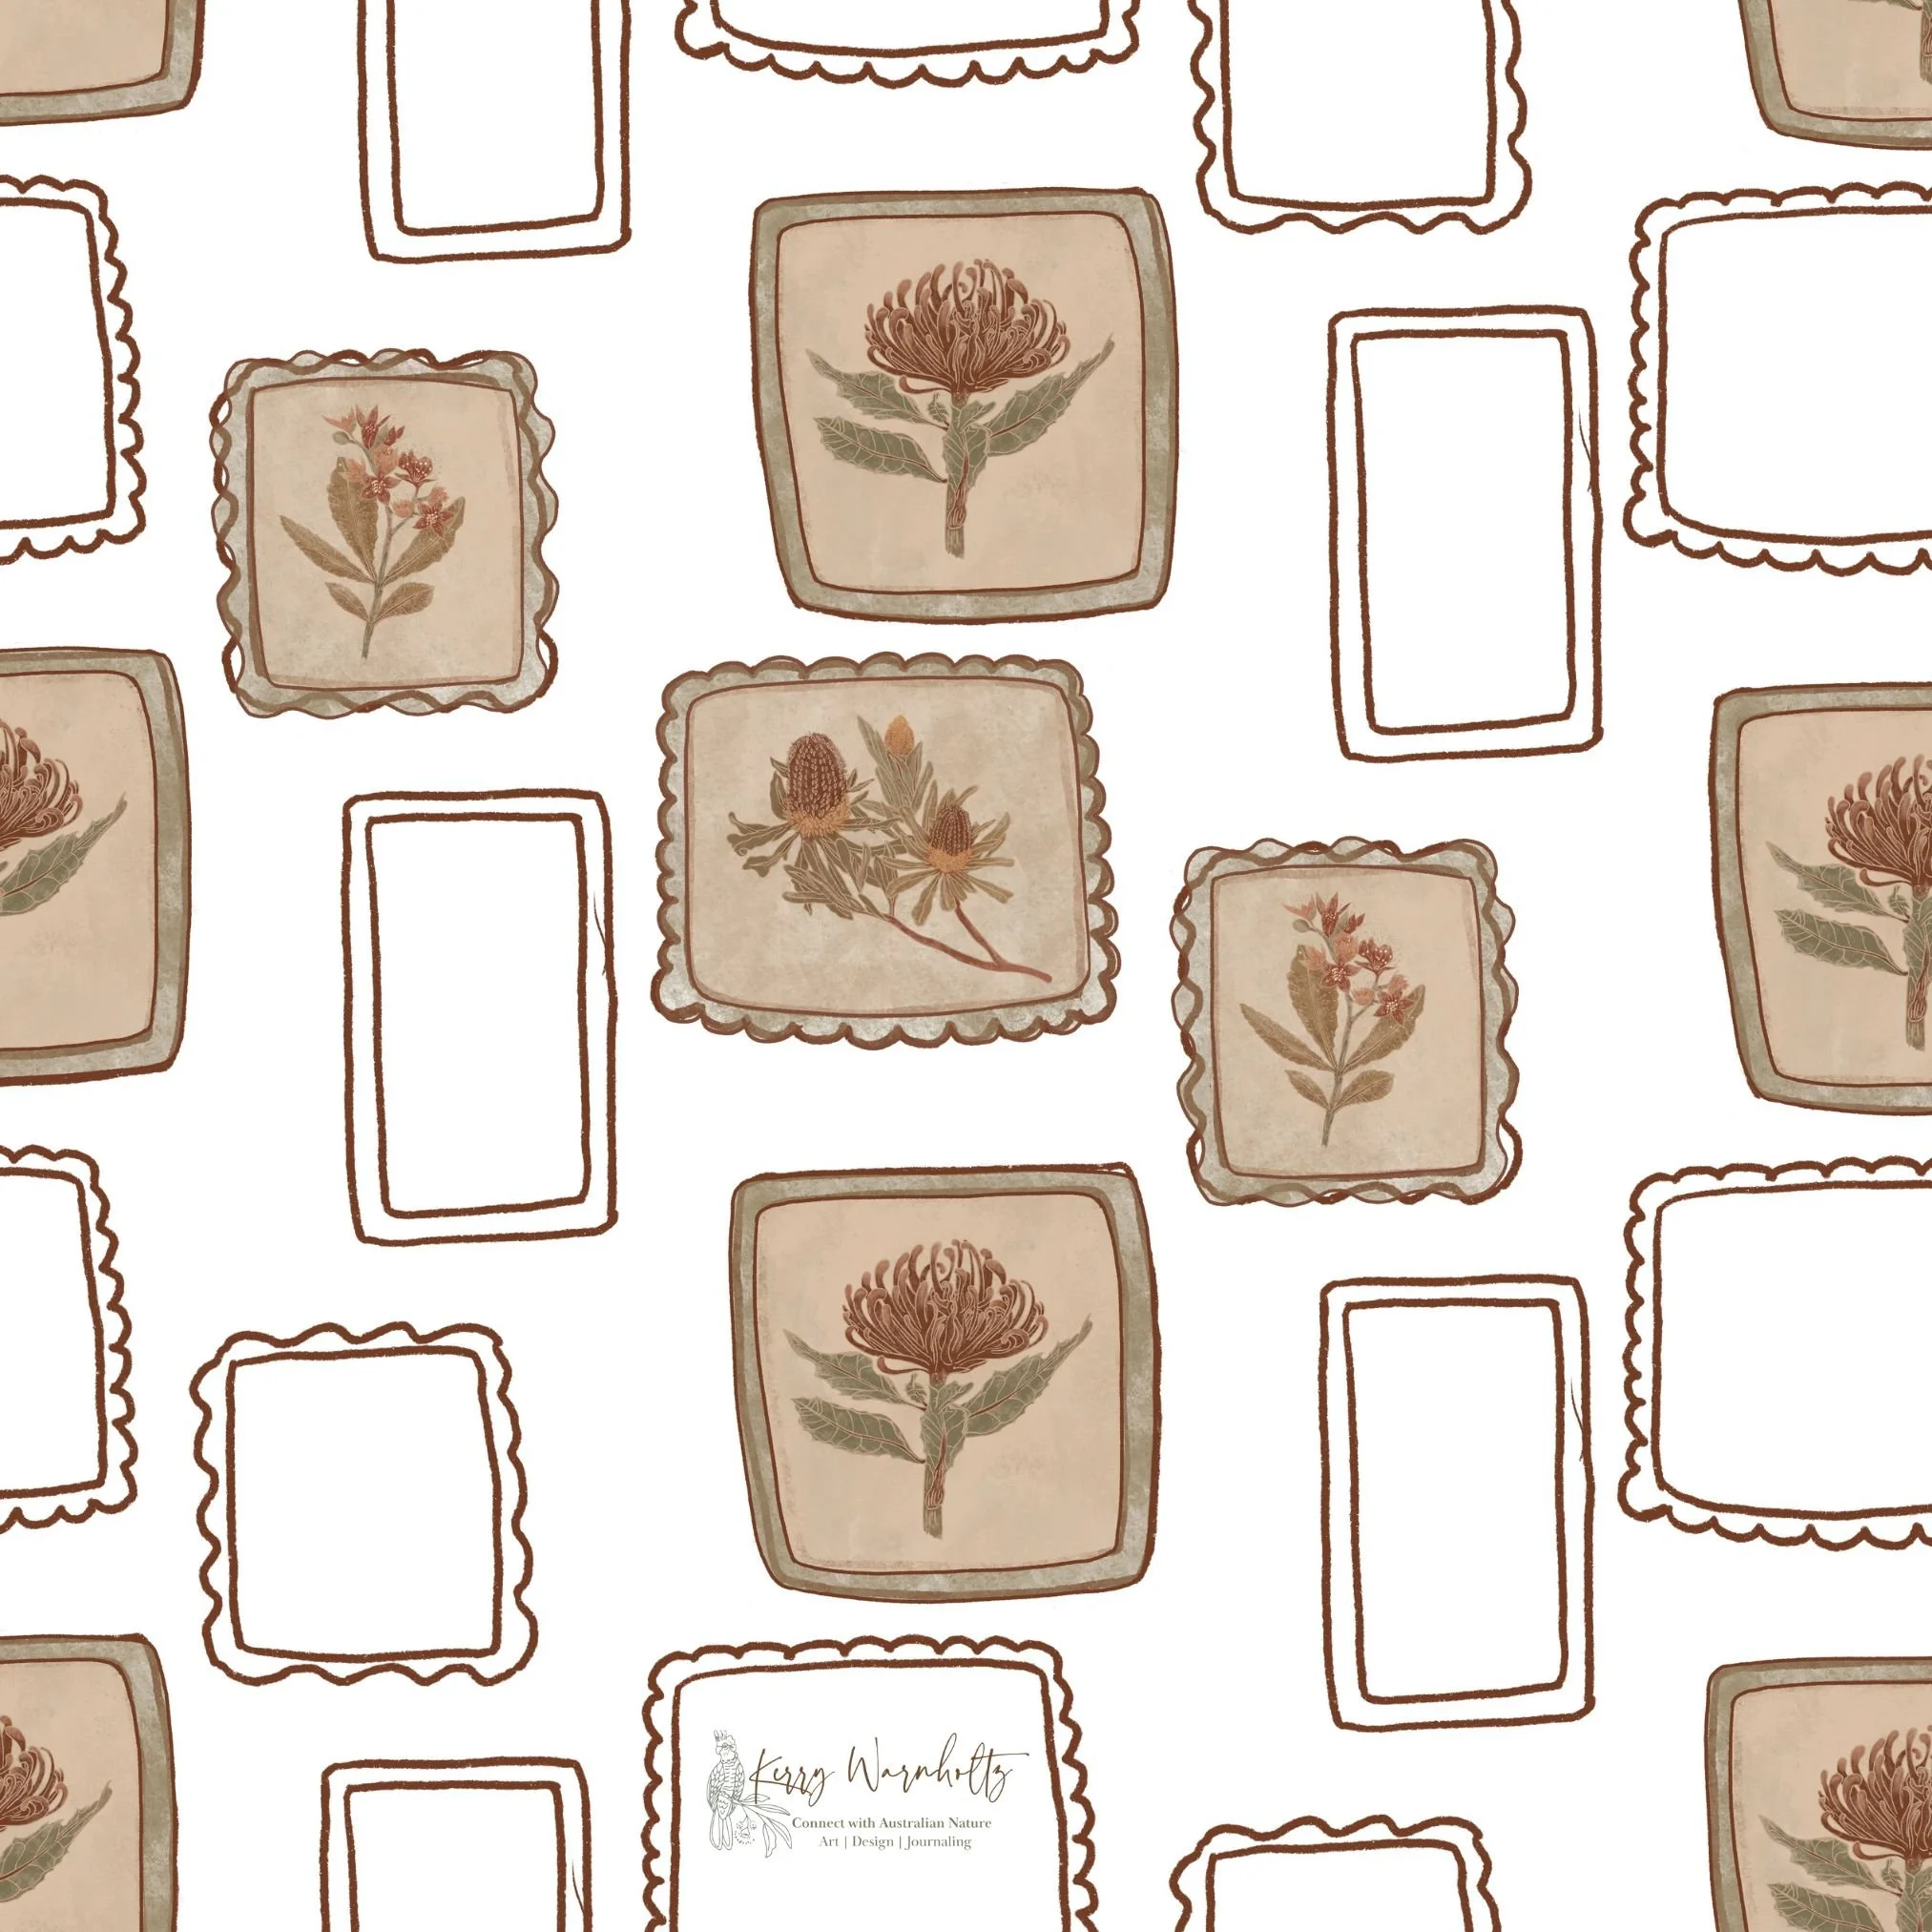
The motifs (individual elements which make up the design) of my pattern were drawn from four Australian native flowers:
Gibraltar Range Waratah (Telopea aspera)
Qld Silver Wattle (Acacia podalyrifolia)
Firewood Banksia (Banksia menziesii)
NSW Christmas Bush (Ceratopetalum gummiferum)
Some of the motifs, like the NSW Christmas Bush were redrawn and repurposed from earlier sketches as well as motifs that I had already drawn and used for previous pattern designs. Other motifs were freshly drawn for this pattern project. Returning to familiar plants and flowers allows me continuity within my broader body of work, while redrawing ensures consistency in line width, scale and quality as I piece together the pattern layout.
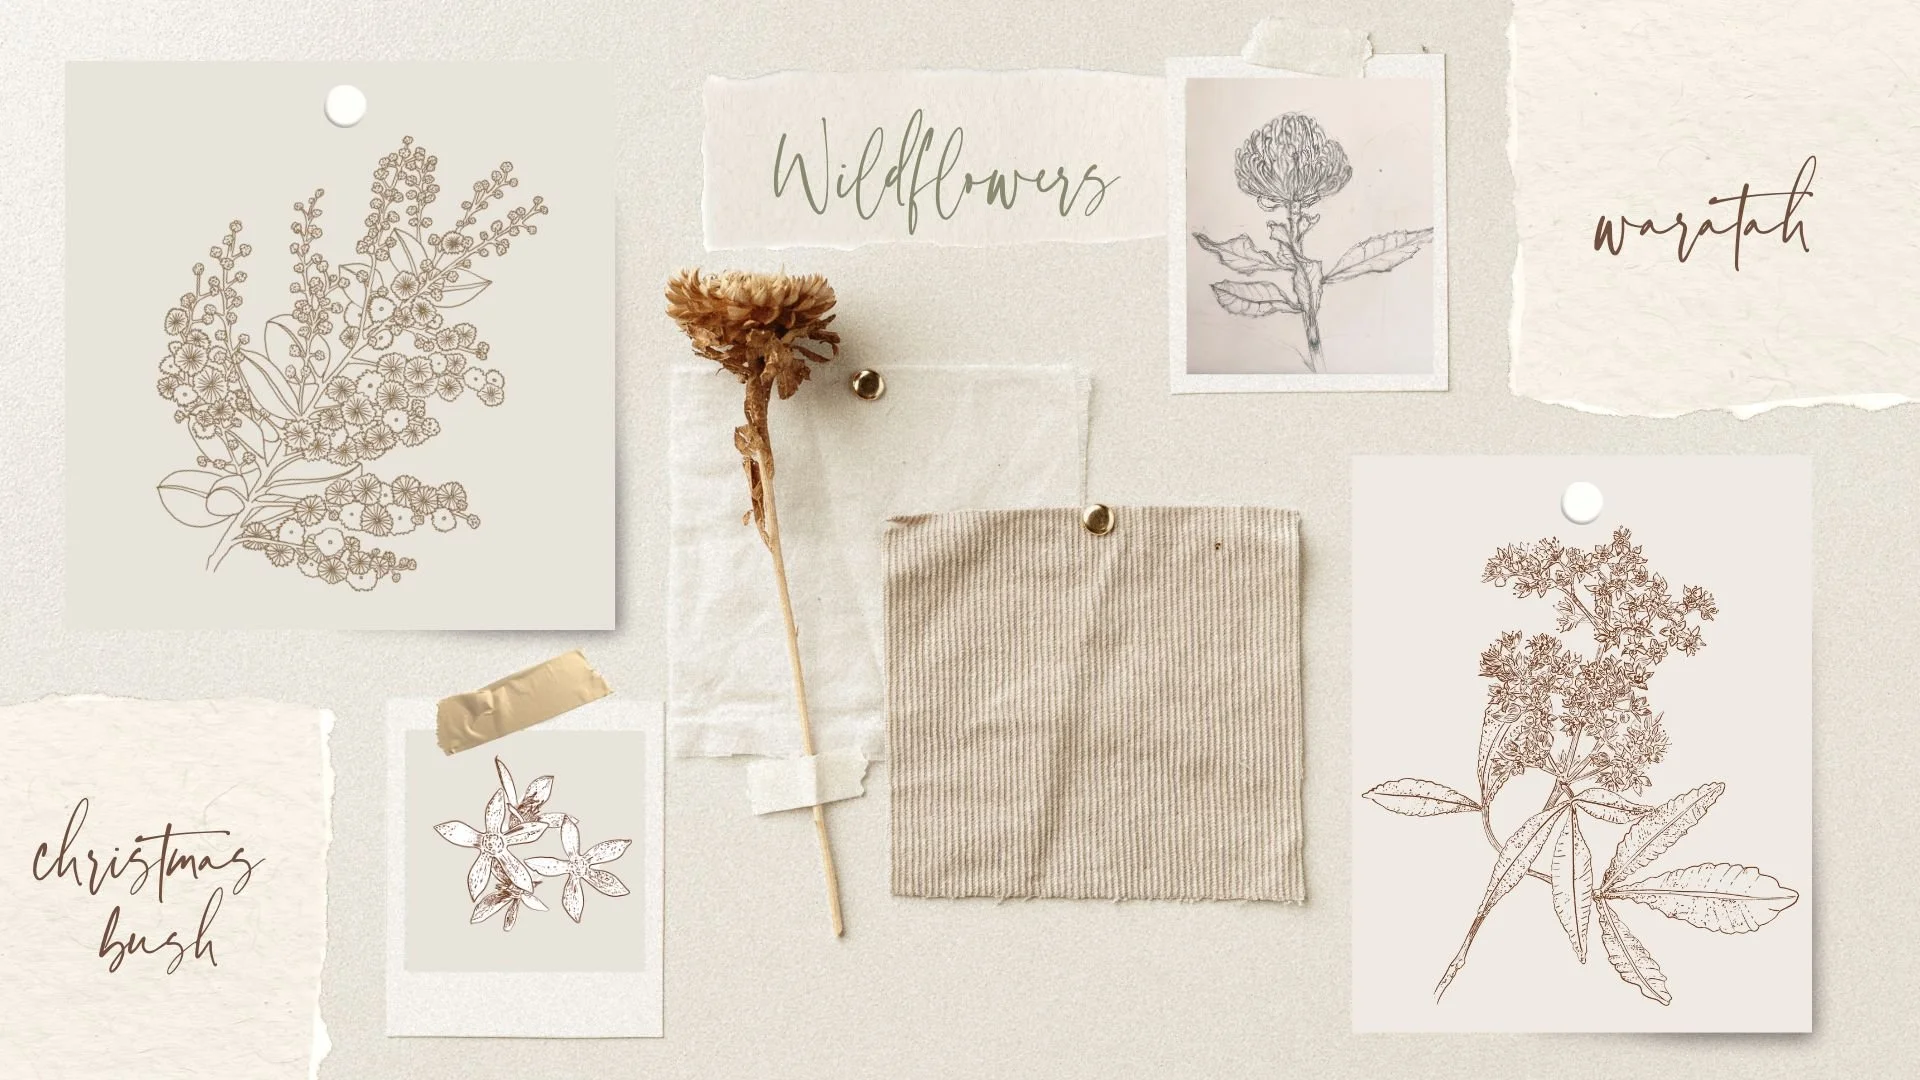
wildflower sketch digital moodboard
From Photography to Motif
The process started with photographic references. I sketched both by hand as well as directly into the Procreate app on my iPad. Any sketches drawn on paper, I photographed them and pulled them into Procreate where I then traced over the top of the sketch. I always start with a rough sketch and refine it a little so that the lines are a little smoother, but still looks hand drawn. I then created an outline or line drawing. I use these outlines as a base to begin building layers. I like to use the dry ink pen in procreate because it creates a nice, imperfect, textured line which has a more organic, natural feel to it and I will usually use the same size line to ensure cohesion throughout all the motifs.
Building Colour in Layers
Once the outlines were finished, colour was introduced in separate layers. But before I begin adding colour, I settled on a core group of colours and varying tones of each colour. The leaves, stems and flowers were constructed independently and in separate layers.
Working in layers allows for:
tonal and colour adjustment without having to redraw the outline or the layers
refinement of the colour palette and checking the colours sit nicely together
improved cohesion across the motifs (if something doesn’t look correct or needs tweaking, I can quickly do that in procreate before committing it to the final pattern).
Below are a couple of the motifs complete with outline and coloured layers.
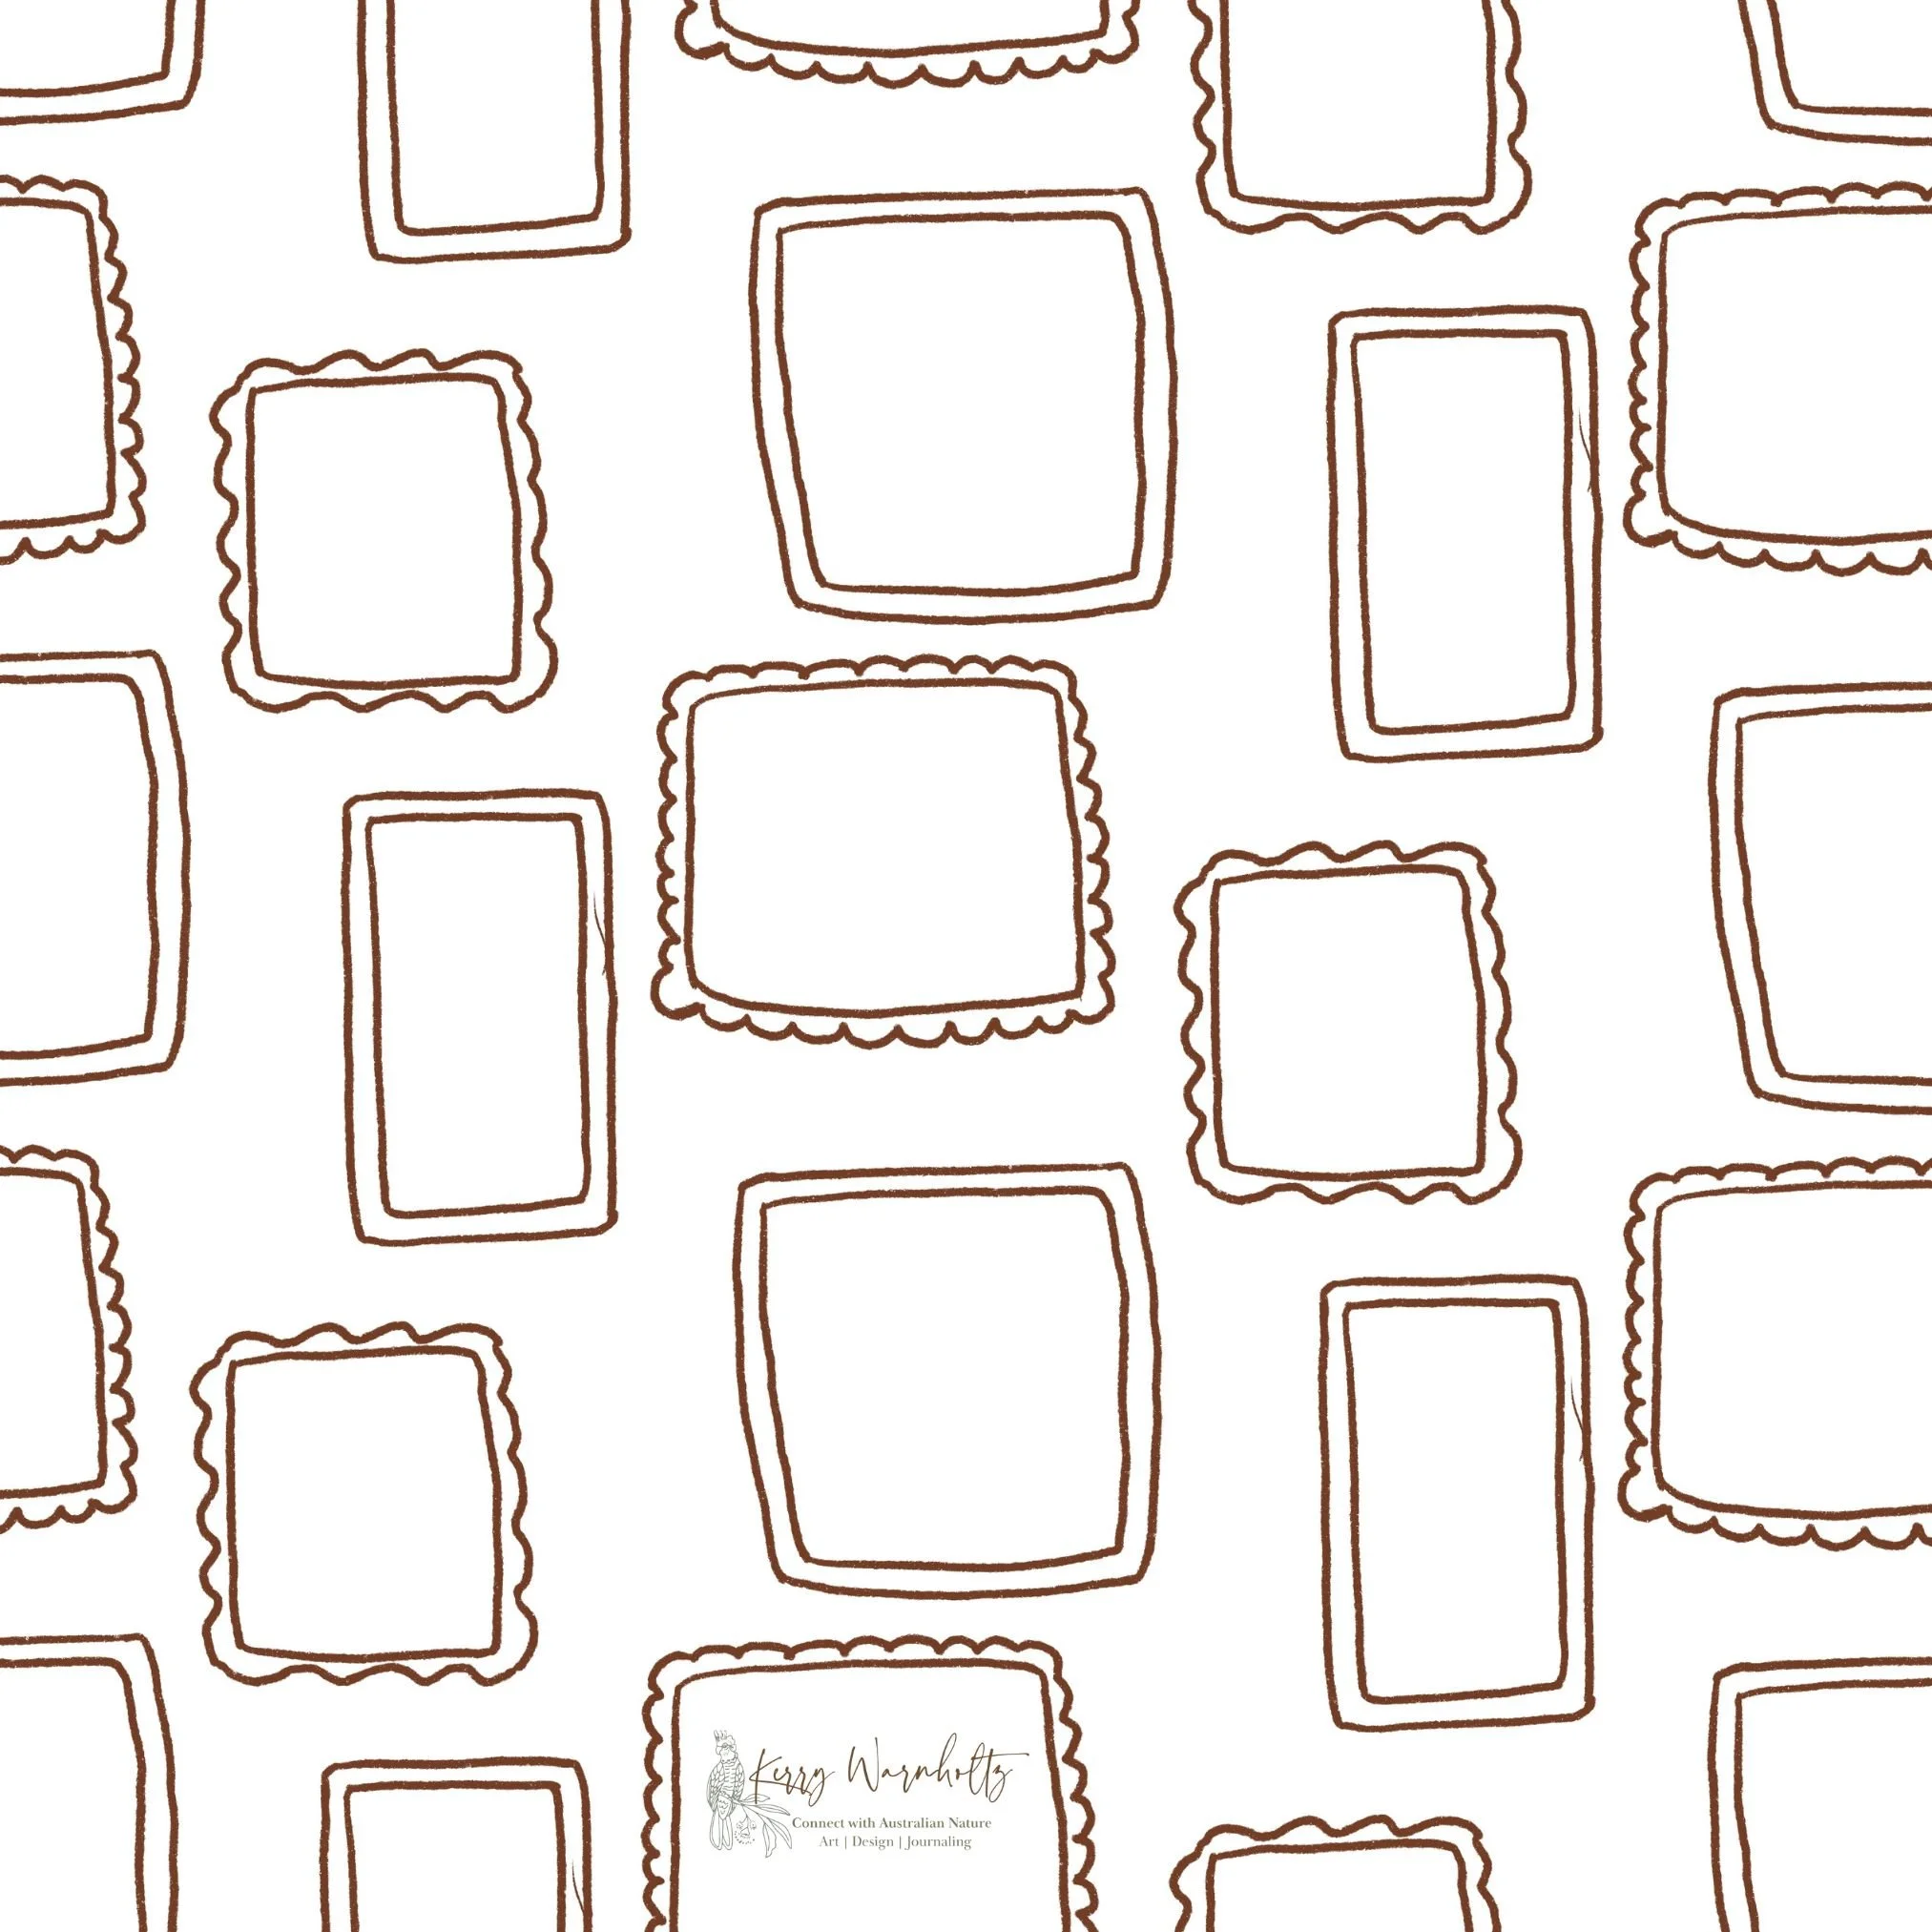
Constructing the Layout
Before moving fully into the digital repeat, I constructed the composition manually. I did this by using what is termed as the ‘Post-it Note’ method, using a half-drop repeat layout. This step helps identify any imbalances quickly. Once I had my repeat and I was happy with the arrangement of the frames, I took a photo of the hand drawn layout and uploaded it to procreate, drew over the frames layout, and dropped the motifs inside the frames. I tried to match the overall shape of the motif with the relevant shaped frame and tweaked it, switching motifs and changing colours as required . I then brought all the individual frames with matching motifs into one document in procreate, using the hand drawn layout as a reference and added a typography background to add interest (you’ll notice that the middle image below with the waratah inside the frame is different to the layout, because I switched things around when checking the final pattern).
Once the skeletal composition felt balanced and I was happy with the overall look, I brought the hand drawn layout into Photoshop, as well as the individual PSD (Photoshop) files of each frame and matching wildflower motifs, as well as the PSD file of the background typography layer.
There, I overlaid the refined motifs, adjusted scale and placement, and made further colour corrections where needed.
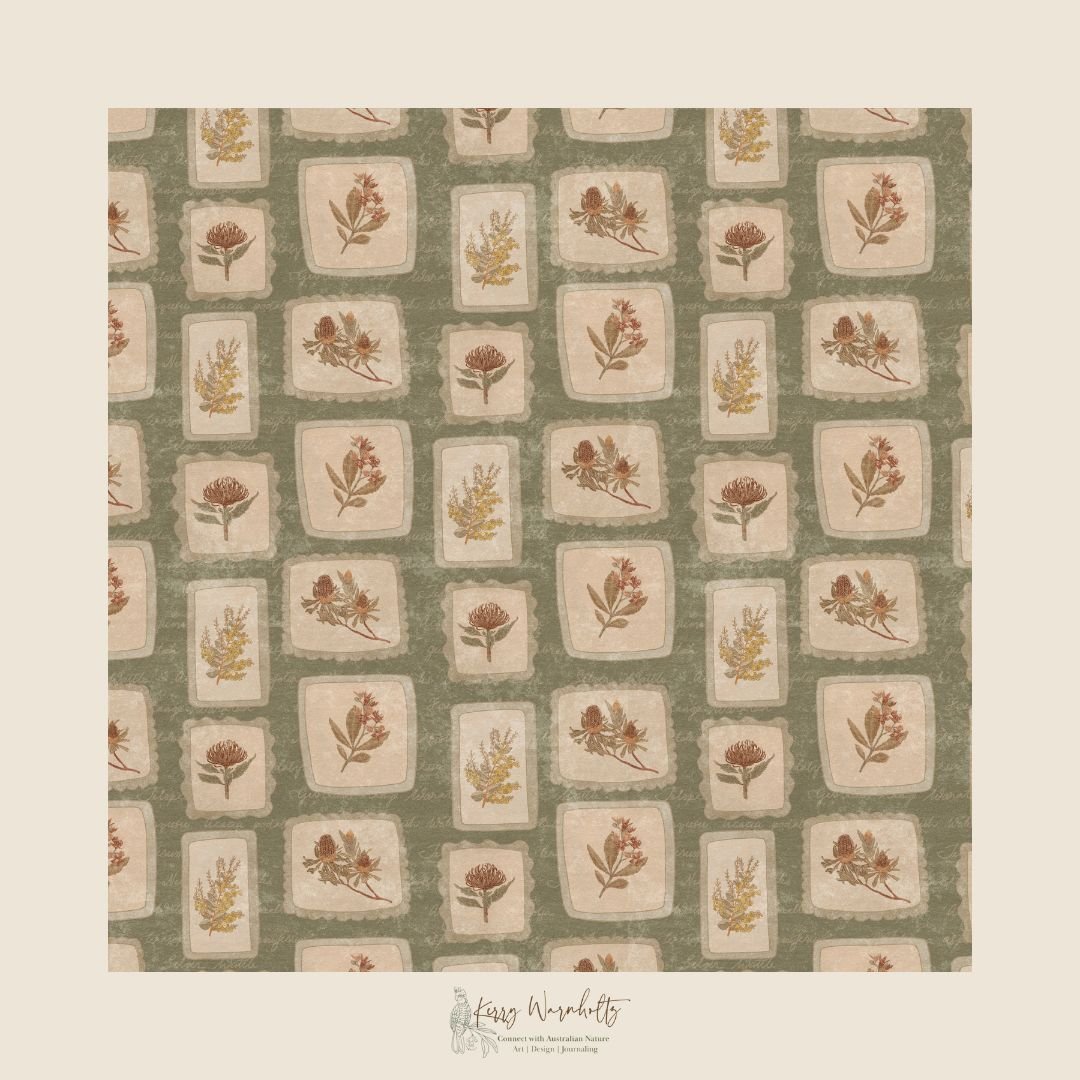
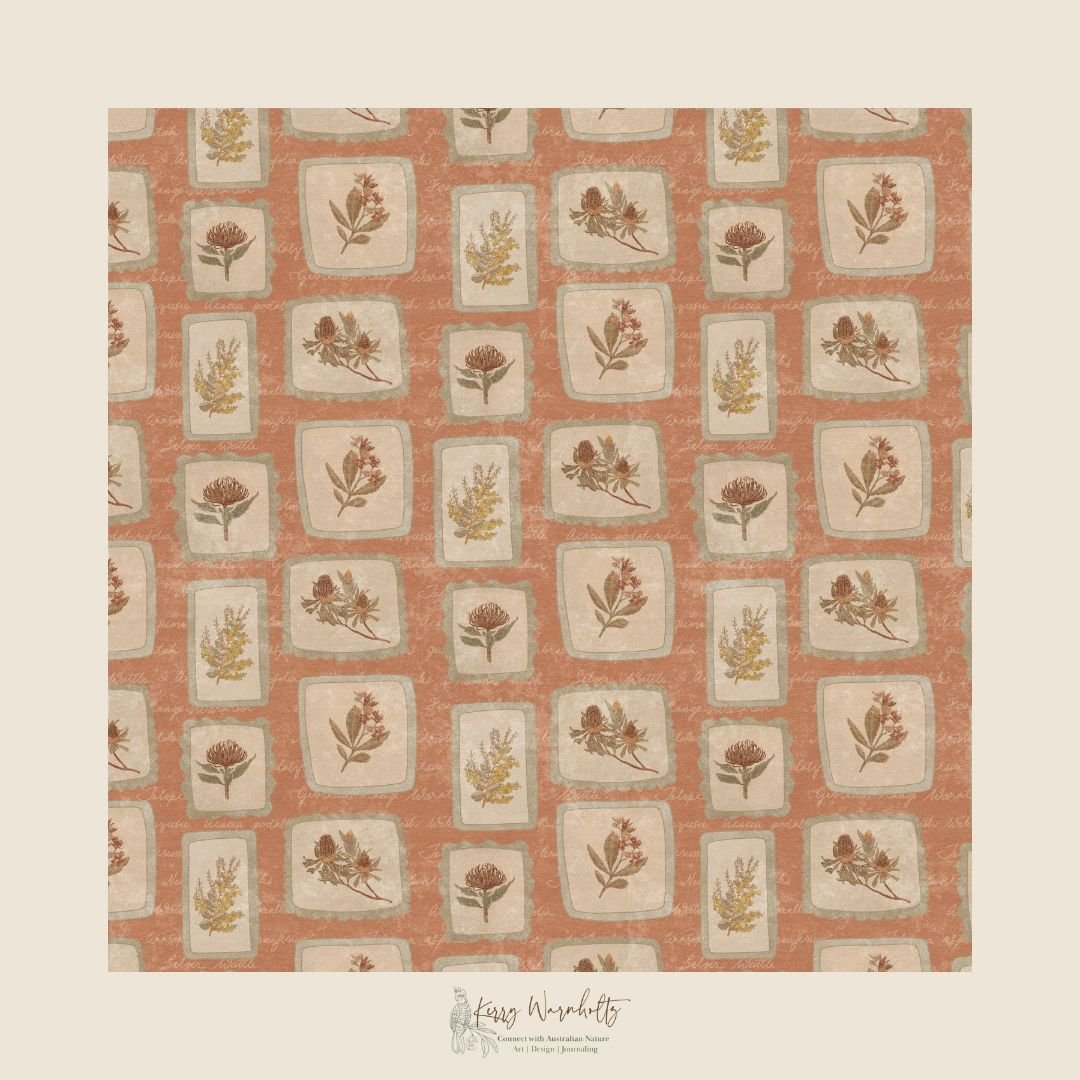
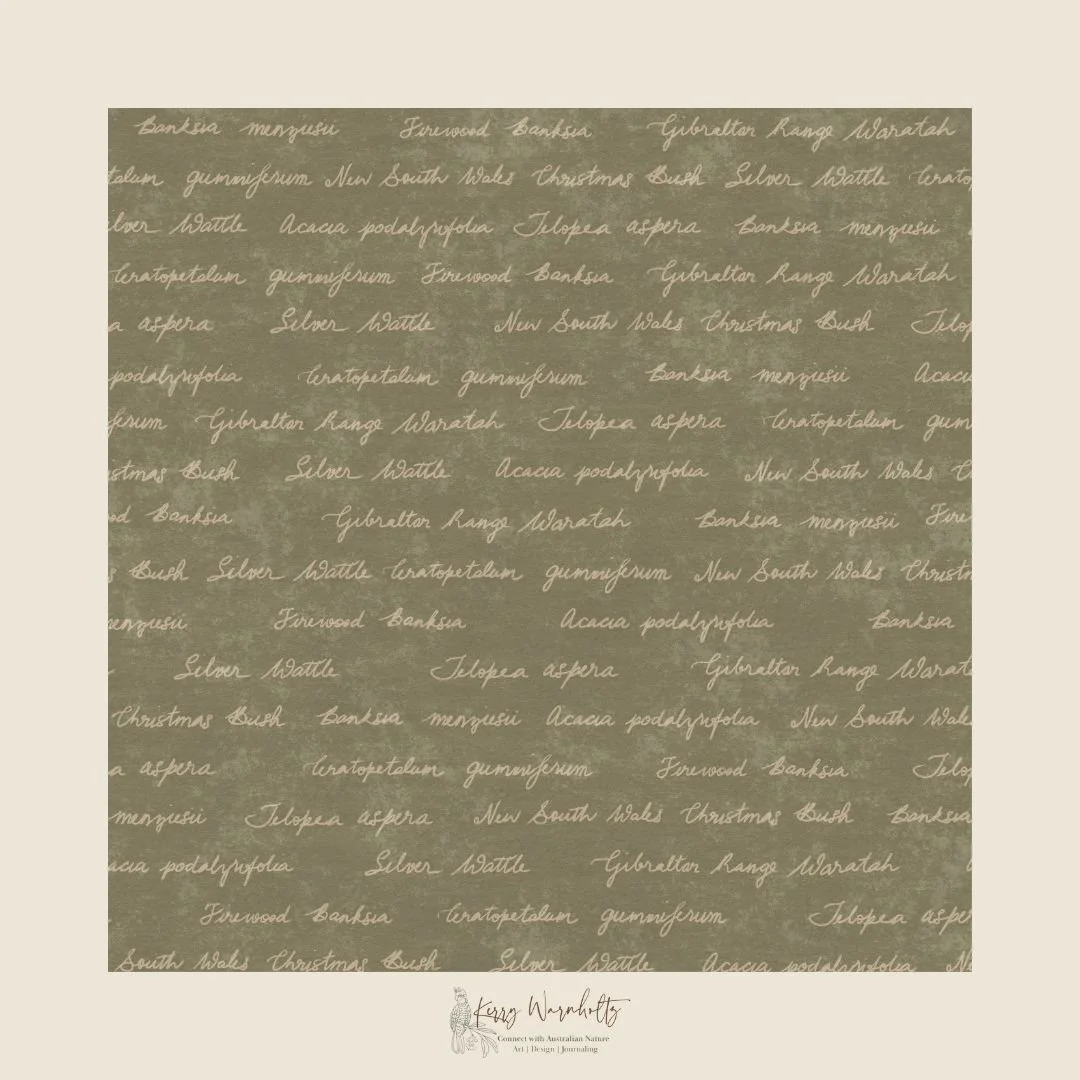
The final repeat pattern emerged through refinement rather than speed. And although this pattern originated from a design challenge, the underlying method is consistent with my broader practice. Be aware though, that it’s taken me a few years to get to this stage where I found a process that I was happy with and suited my design style. And I’m still tweaking that as I create more patterns. Below are the final repeat patterns. The first two called Australian ‘Wildflower Collage’, with two different background colours, Sage Green and Peach Clay, drawn from the motifs. The last image is the background typography layer, which I then turned into a coordinate pattern to complement the wildflower collage pattern. From these, I’ve created multiple background colours of each pattern, as well as an alternate soft pastel colourway, which you can see here on fabric and upholstery in my Spoonflower shop. I am also still working on additional blenders and co-ordinates to round out this collection.
Continuing the Practice
This pattern project for the Wildflower Collage design challenge, was such a beneficial way to ease back into the pattern creation process after a year long break. And it’s reinforced something I’ve been leaning into this year…a slower, more deliberate creative rhythm.
Rather than creating something quickly, I’m aiming to allow my designs to move through the research, sketch, manual composition and digital refinement process in a more intentional and sequential way. It feels more organic and cohesive, rather than just hurriedly throwing things together.
If you’d like to follow the continued development of this collection, including additional colourways, blenders and coordinates, I’ll be sharing those along the way. You’re also welcome to follow me on Instagram where I try to post each week if I can.
And for those interested in exploring how observational drawing translates into design thinking, we’ll be working through similar foundations in upcoming workshops. You can find out more about these on my ‘Workshops & Events’ page.
Because, before the pattern, there is practice.